Secrets to Soft Cranberry Orange Rolls: Yeast Dough Tips & Tricks
There's something uniquely comforting and utterly delightful about a batch of freshly baked sweet rolls, especially during the holidays. While cinnamon rolls often steal the spotlight, imagine a festive alternative that’s equally tender, impossibly gooey, and bursting with bright, seasonal flavors. Enter the cranberry orange roll – a true culinary masterpiece that perfectly balances tart cranberries with sweet, zesty orange, all encased in a dreamy, soft yeast dough. This isn't just a
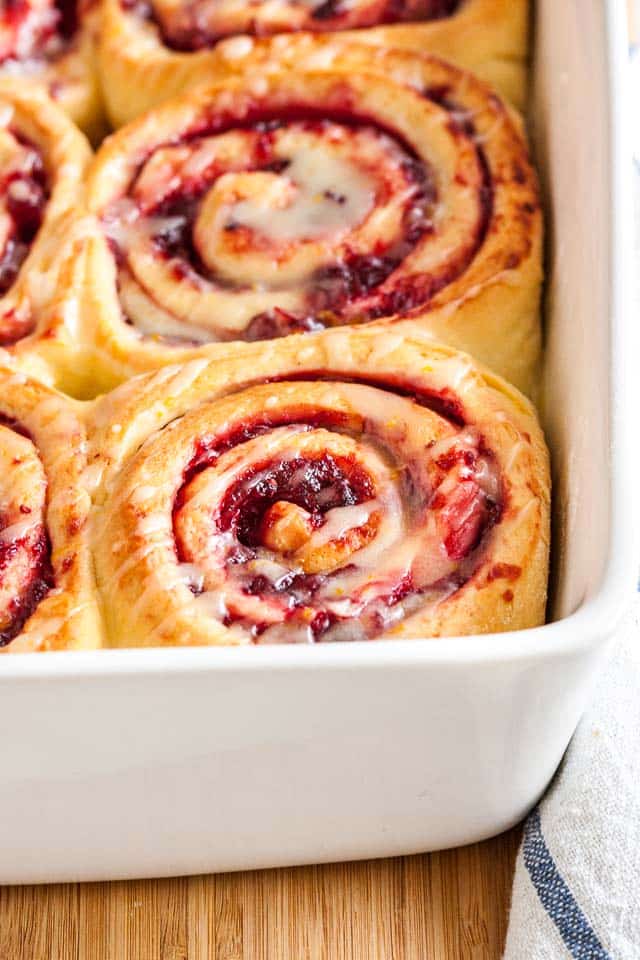
Gooey Cranberry Orange Rolls: The Ultimate Holiday Sweet Roll; it's an experience. If you've ever dreamt of perfecting that pillowy texture and vibrant taste, the secret lies in mastering your yeast dough.
These homemade cranberry orange rolls are designed to be a showstopper for any holiday breakfast or brunch. Drizzled with an irresistible sweet orange glaze, they offer a visual appeal that's as enchanting as their taste. Forget dry, crumbly pastries; we're aiming for a texture so soft and tender it practically melts in your mouth, leaving no trace of that unpleasant "yeasty" aftertaste that can plague rushed recipes. This comprehensive guide will arm you with all the essential tips and tricks to ensure your homemade cranberry orange rolls are not just good, but truly unforgettable.
The Magic Behind Perfectly Soft Cranberry Orange Rolls
What makes a truly exceptional sweet roll? It's a combination of several factors, but chief among them is the delicate balance of flavor and the ethereal texture of the dough. Our cranberry orange rolls shine because they move beyond the predictable, offering a sophisticated flavor profile that marries the tartness of cranberries with the sunny sweetness of fresh orange. This vibrant filling, nestled within a fluffy, tender dough and crowned with a citrusy glaze, elevates them beyond a mere breakfast pastry to a celebratory treat.
While it might be tempting to opt for shortcut recipes, the true reward comes from investing a little time and using quality ingredients. Patience with the rising process and precision in your measurements will transform simple ingredients into something extraordinary. This commitment ensures your rolls are consistently gooey, soft, and perfectly baked, without a hint of that dense, under-risen quality or an overpowering yeast flavor that often results from too much yeast and too little proofing time. The result is a breakfast treat so good, it might just replace your traditional favorites. For those who appreciate a well-crafted sweet roll, these are a revelation – arguably
Better Than Cinnamon Rolls? Make-Ahead Cranberry Orange Sweet Rolls that fit perfectly into your busy schedule.
Mastering Yeast Dough for Unforgettable Rolls
The heart of any soft, fluffy roll is the yeast dough. Understanding how to work with yeast is paramount, and it's simpler than many believe!
The Crucial Role of Milk Temperature
One of the most common pitfalls in yeast baking is incorrect milk temperature. Yeast is a living organism, and like all living things, it thrives in a specific environment.
- Warm, Not Hot: The milk should be warm to the touch, ideally between 100°F and 110°F (38°C to 43°C). This is warm enough to activate the yeast without shocking or killing it.
- Use a Thermometer: For consistent results, invest in an instant-read thermometer. Guessing can lead to disaster.
- Too Hot (130°F/54°C or higher): If the milk is too hot, it will kill the yeast, and your dough simply won't rise. There’s no coming back from dead yeast.
- Too Cold (Below 100°F/38°C): If the milk is too cold, the yeast will activate very slowly, or not at all, leading to a long, sluggish rise or no rise whatsoever.
Understanding Yeast Types and Activation
The reference mentioned Instant Dry Yeast, which is fantastic for these rolls.
- Instant Dry Yeast: This type of yeast is very convenient because it can be added directly to your dry ingredients without prior proofing. Its granules are smaller, and it’s designed to activate quickly.
- Active Dry Yeast: If you're using active dry yeast, you'll need to "proof" it first. Dissolve the yeast in your warm milk (with a pinch of sugar to give it something to eat) for 5-10 minutes until it becomes foamy. This confirms the yeast is alive and active before you add it to your flour. While instant dry yeast is often preferred for its direct addition, both types can yield excellent results with proper handling.
Accurate Flour Measurement
Measuring flour correctly is critical for the dough's consistency. Too much flour results in a dense, dry roll, while too little makes it too sticky to handle.
- Spoon and Level Method: Do not scoop flour directly from the bag with your measuring cup, as this compacts it, adding up to 25% more flour than needed. Instead, lightly spoon flour into your measuring cup until it overflows, then level off the top with a straight edge (like a knife or ruler).
- Weighing is Best: For ultimate precision, especially in baking, weighing your flour with a digital kitchen scale is highly recommended. Recipes often provide flour measurements in grams for this reason.
The Art of Kneading
Kneading develops the gluten in the flour, which gives the rolls their structure, elasticity, and chewy-soft texture.
- Stand Mixer Method: Using a stand mixer with a dough hook is the easiest method. Knead on medium speed for 8-10 minutes, until the dough is smooth, elastic, and pulls away from the sides of the bowl.
- Hand Kneading Method: If you don’t have a stand mixer, don't despair! You can absolutely knead by hand. This takes longer (typically 12-15 minutes or more) and provides a good workout. Start by stirring the ingredients with a spoon until combined, then turn the sticky dough out onto a lightly floured surface. Knead by folding the dough towards you, pushing it away with the heel of your hand, turning, and repeating. You may need to use a little more flour to prevent excessive stickiness, but be mindful not to add too much. The dough is ready when it's smooth, elastic, and springs back when gently poked.
The Patience of Rising (Proofing)
Rising is where the magic happens, as the yeast produces carbon dioxide, creating those airy pockets.
- Ideal Conditions: Place your dough in a lightly oiled bowl, cover it with plastic wrap or a clean kitchen towel, and let it rise in a warm, draft-free place. A slightly warm oven (turned off, with just the light on) or a sunny spot on the counter can work well.
- First Rise: This primary rise allows the dough to develop flavor and structure. It typically takes 1 to 1.5 hours, or until the dough has doubled in size.
- Second Rise: After shaping the rolls and placing them in the baking pan, they need a second, shorter rise. This ensures the rolls are light and fluffy once baked. This usually takes 30-45 minutes, or until visibly puffy.
- Avoid Over-proofing: While tempting to let it rise "just a little longer," over-proofed dough can collapse in the oven, leading to a tough texture and sometimes a yeasty flavor. Under-proofed dough will be dense. Learn to recognize the visual cues of a perfectly risen dough.
Crafting the Irresistible Cranberry Orange Filling and Glaze
A great roll is only as good as its filling and glaze! The cranberry orange combination is truly special.
The Sweet and Tart Cranberry Filling
The filling provides that burst of festive flavor.
- Homemade vs. Shortcut: While making your own cranberry sauce from fresh cranberries and orange zest provides the freshest, most vibrant flavor, you can absolutely use shortcuts. Leftover holiday cranberry sauce or even quality canned cranberry sauce works beautifully. You’ll need approximately 2 cups.
- Enhance with Zest: Regardless of your sauce source, grating fresh orange zest directly into the cranberry filling amplifies the citrus notes, creating a deeper, more aromatic experience. A pinch of cinnamon or a touch of ginger can also add lovely warmth.
The Dazzling Orange Glaze
This simple glaze is the perfect finishing touch.
- Simple Yet Essential: A basic powdered sugar glaze mixed with fresh orange juice and plenty of orange zest is all you need. The zest is key here, infusing the glaze with bright, aromatic orange oil.
- Consistency is Key: Adjust the amount of orange juice until you achieve a drizzly, pourable consistency. You want it thick enough to cling to the rolls but thin enough to spread easily.
Smart Strategies for Stress-Free Holiday Baking (and Beyond!)
These tips will help you manage your baking schedule and ensure perfect results every time.
The Convenience of Making Ahead
One of the best features of this
cranberry orange rolls recipe is its make-ahead potential, making it perfect for busy holiday mornings.
- Overnight Refrigeration: After you’ve shaped the filled rolls and placed them into your baking pan, cover the pan tightly with plastic wrap. Store it in the refrigerator overnight (up to 12-18 hours). The cold temperature will significantly slow down the yeast activity.
- Bring to Room Temperature: The next morning, remove the pan from the fridge. Allow the rolls to come to room temperature and complete their second rise before baking. This typically takes about 1 hour, but could be slightly longer depending on the warmth of your kitchen. They should look visibly puffy before going into the oven. This method is a game-changer for stress-free breakfast preparation.
Baking to Perfection
Every oven is different, and baking dish material can also impact baking time.
- Know Your Oven: Ovens can vary widely in temperature, so it’s wise to use an oven thermometer to ensure accuracy.
- Baking Dish Matters: A dark metal pan might bake faster and produce a darker crust than a light metal or ceramic dish. Adjust baking time accordingly.
- Testing for Doneness: To check if your rolls are done, gently insert a small fork or skewer between two rolls and carefully pull away a tiny piece of dough from the center. If it’s still raw, return the rolls to the oven for another 5 minutes, then recheck. The tops should be golden brown, and the centers should be cooked through.
Storage and Reheating
While best enjoyed fresh, these rolls can be stored and reheated.
- Storage: Store leftover rolls in an airtight container at room temperature for up to 2-3 days. For longer storage, refrigerate for up to a week.
- Reheating: Gently reheat rolls in the microwave for 15-30 seconds, or wrap them loosely in foil and warm in a preheated oven (300°F/150°C) for 10-15 minutes until soft and warm throughout.
Crafting homemade cranberry orange rolls is a deeply rewarding experience. By understanding the nuances of yeast dough – from milk temperature and yeast types to proper kneading and patient rising – you unlock the secret to bakery-quality results right in your own kitchen. These festive, flavorful, and incredibly soft sweet rolls are more than just a recipe; they’re an invitation to create cherished holiday memories and savor truly exceptional flavors. Don't be intimidated by yeast; embrace the process, follow these tips, and prepare to delight your family and friends with the best cranberry orange rolls they've ever tasted. Your efforts will be richly rewarded with every gooey, tender bite!